ZITADEL with Java Spring Boot
This integration guide demonstrates the recommended way to incorporate ZITADEL into your Spring Boot web application. It explains how to enable user login in your application and how to fetch data from the user info endpoint.
By the end of this guide, your application will have login functionality and will be able to access the current user's profile.
This documentation references our example on GitHub. You can either create your own application or directly run the example by providing the necessary arguments.
Set up application
Before we begin developing our application, we need to perform a few configuration steps in the ZITADEL Console. You'll need to provide some information about your app. We recommend creating a new app to start from scratch. Navigate to your Project, then add a new application at the top of the page. Select the Web application type and continue.
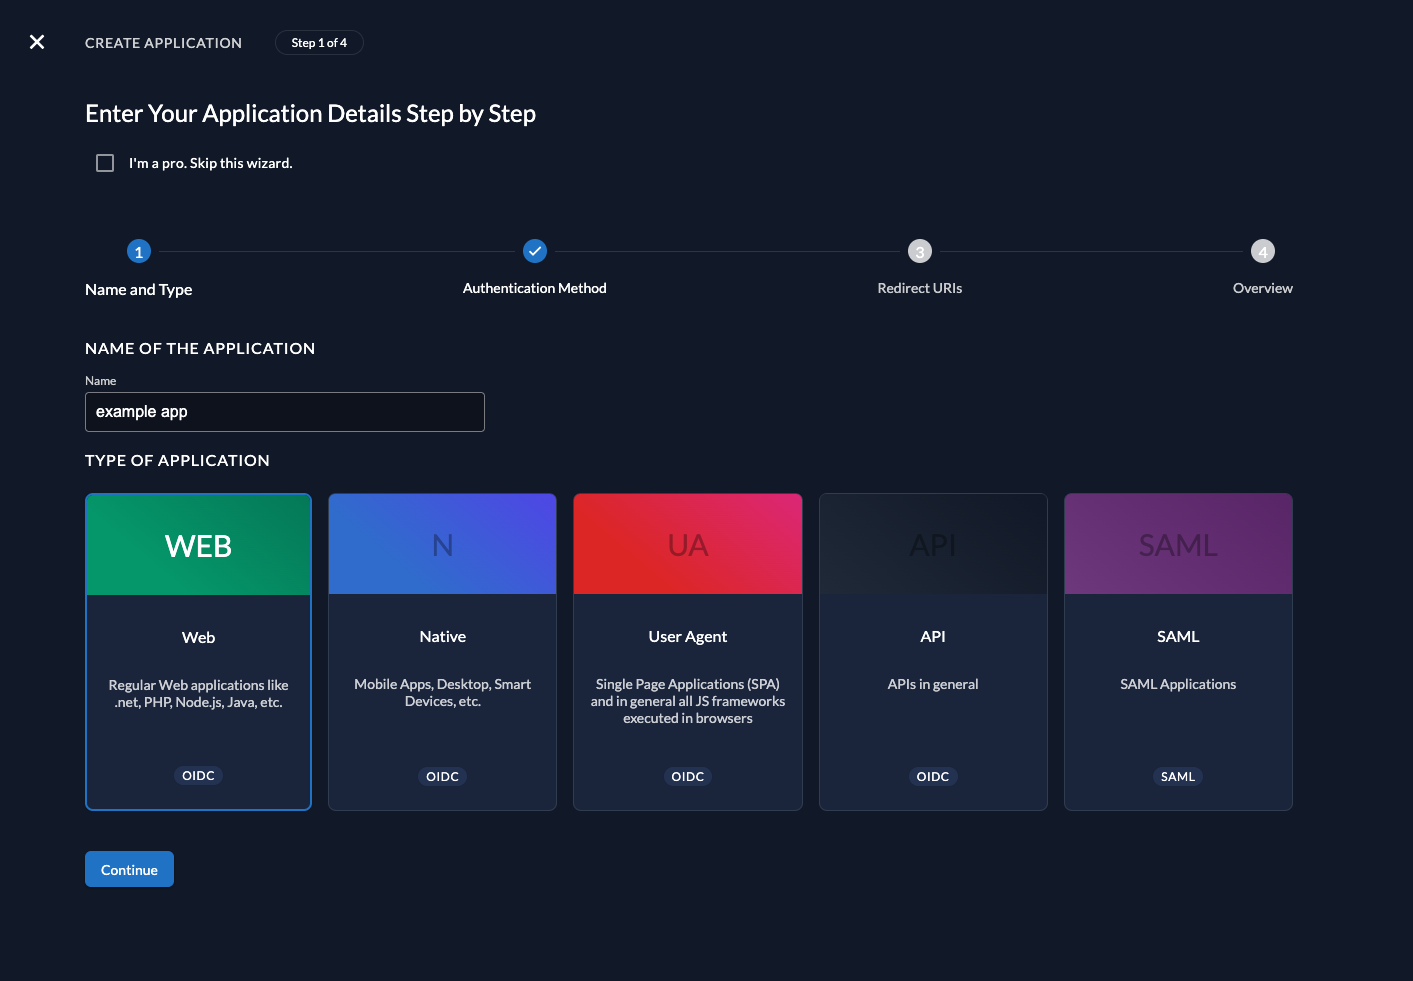
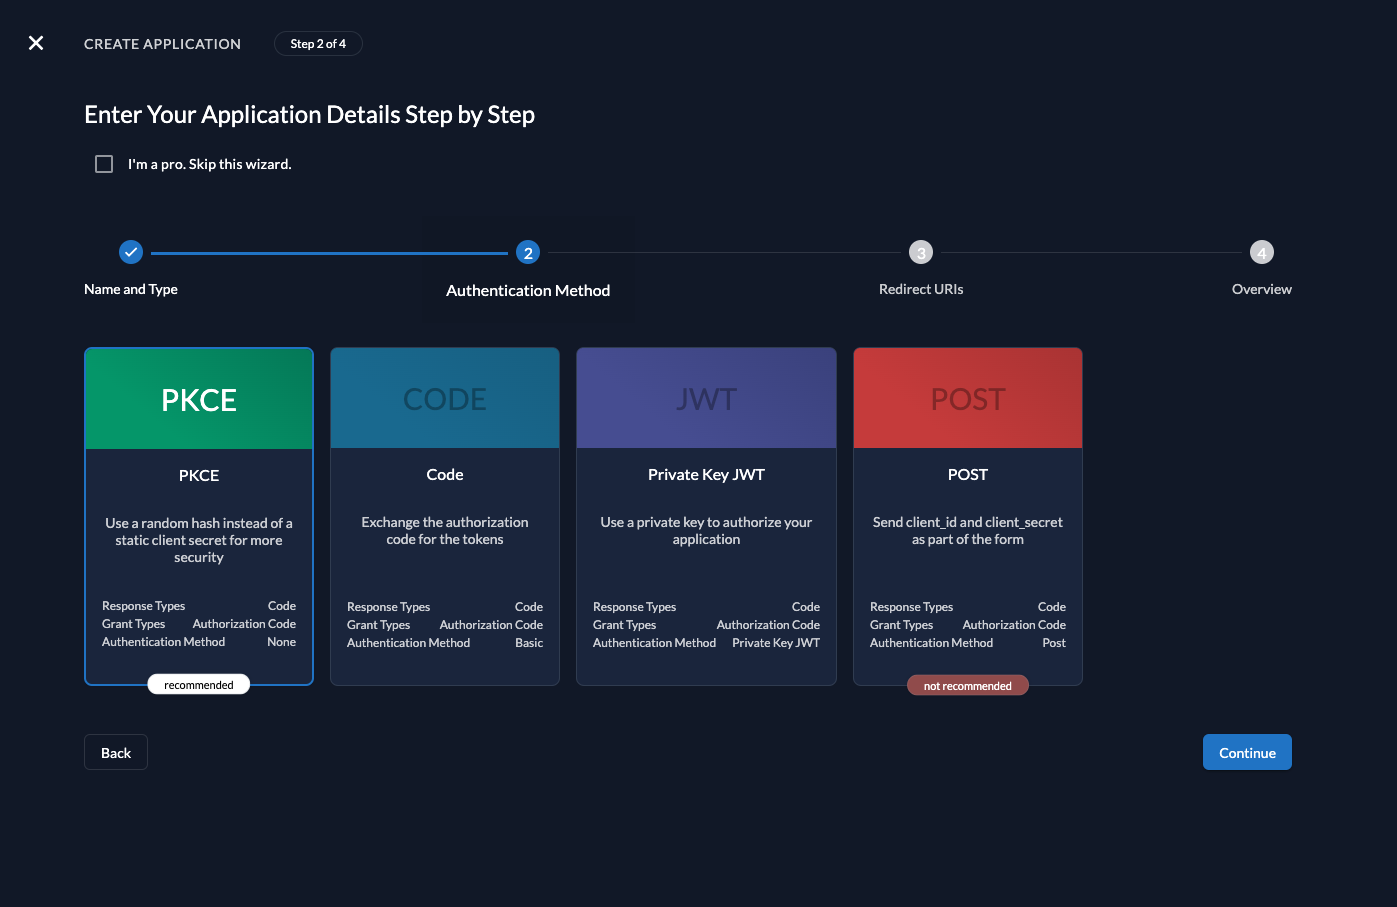
We recommend that you use Proof Key for Code Exchange (PKCE) for all applications.
Redirect URIs
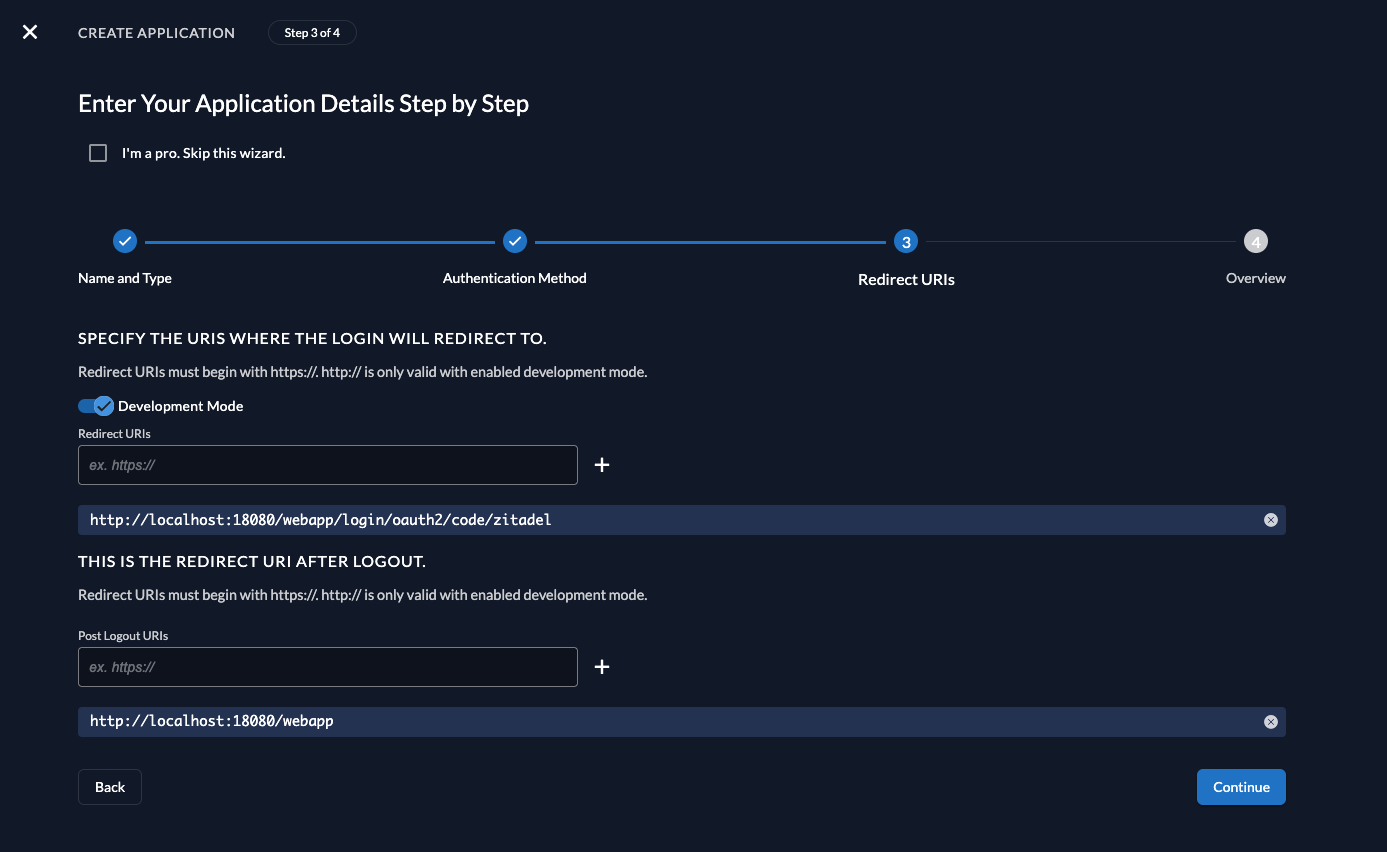
The Redirect URIs field tells ZITADEL where it's allowed to redirect users after authentication. For development, you can set dev mode to true to enable insecure HTTP and redirect to a localhost URI.
The Post-logout redirect send the users back to a route on your application after they have logged out.
If you are following along with the example, set the dev mode to true, the Redirect URIs to http://localhost:18080/webapp/login/oauth2/code/zitadel and Post redirect URI to http://localhost:18080/webapp.
Continue and create the application.
Client ID
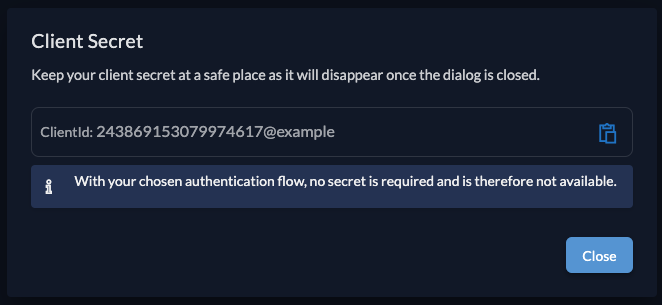
After successful creation of the app, a pop-up will appear displaying the app's client ID. Copy the client ID, as you will need it to configure your Java client.
Spring setup
Now that you have configured your web application on the ZITADEL side, you can proceed with the integration of your Spring client. This guide will reference the example repository and explain the necessary steps taken in there. If your starting from scratch, you can use the Spring Initializer with the following setup as a base.
Support classes
To be able to take the most out of ZITADELs RBAC, we first need to create a GrantedAuthoritiesMapper, that will map the role claims (urn:zitadel:iam:org:project:roles)
into Spring Security authiorities, which can be used later on to determine the granted permissions.
So in your application, create a 'support/zitadel' package and in there the ZitadelGrantedAuthoritiesMapper.java:
https://github.com/zitadel/zitadel-java/blob/main/web/src/main/java/demo/support/zitadel/ZitadelGrantedAuthoritiesMapper.java
The following two classes will provide you the possibility to access and use the user's token for requests to another API, e.g. the Spring Boot API example.
Directly create them in the support package.
https://github.com/zitadel/zitadel-java/blob/main/web/src/main/java/demo/support/TokenAccessor.java
https://github.com/zitadel/zitadel-java/blob/main/web/src/main/java/demo/support/AccessTokenInterceptor.java
Application server configuration
As we have now our support classes, we can now create and configure the application server (and API client) itself.
In a new config package, create first the WebClientConfig.java, which will provide a RestTemplate using the previously created AccessTokenInterceptor:
https://github.com/zitadel/zitadel-java/blob/main/web/src/main/java/demo/config/WebClientConfig.java
Additionally also create the WebSecurityConfig.java in the same package. This class will take care of the authentication, redirecting the user to the login,
mapping the claims (using the ZitadelGrantedAuthoritiesMapper) and also provide the possibility for logout:
https://github.com/zitadel/zitadel-java/blob/main/web/src/main/java/demo/config/WebSecurityConfig.java
For the authentication (and the server in general) to work, the application needs some configuration, so please provide the following to your application.yml (resources folder):
https://github.com/zitadel/zitadel-java/blob/main/web/src/main/resources/application.yml
Note that both the issuer-uri as well as the client-id are only placeholders. You can either change them in here using the values provided by ZITADEL
or pass them later on as arguments when starting the application.
Add pages to your application
To be able to serve these pages create a templates directory in the resources folder.
Now create three HTML files in the new templates folder and copy the content of the examples:
index.html
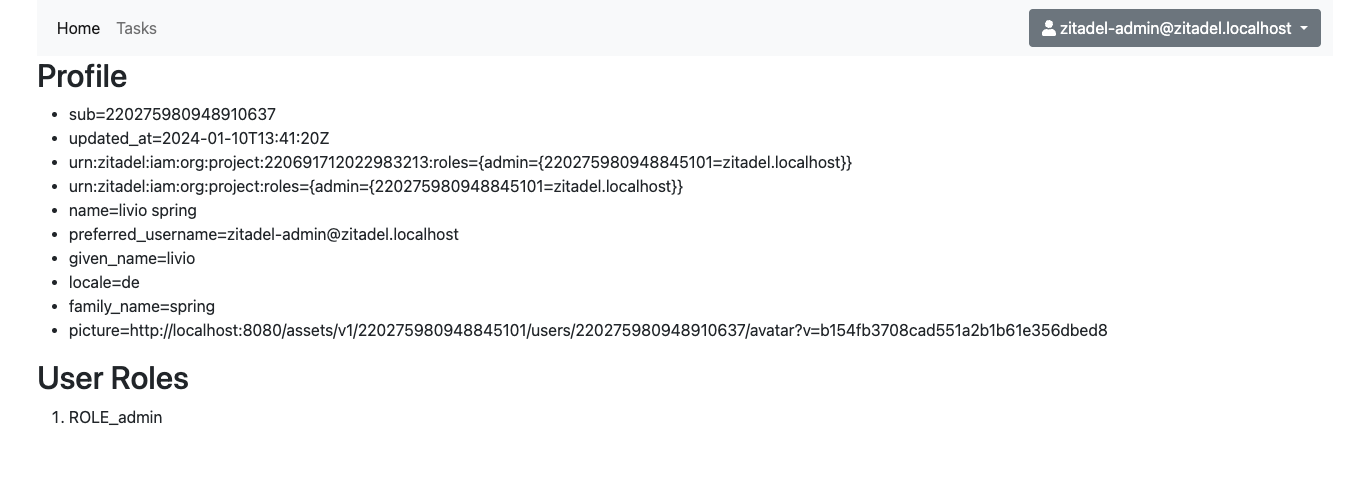
The home page will display the Userinfo from the authentication context and the granted roles / Spring security authorities.
https://github.com/zitadel/zitadel-java/blob/main/web/src/main/resources/templates/index.html
fragments.html
The navigation to switch between the home and tasks page and allows the user to logout.
https://github.com/zitadel/zitadel-java/blob/main/web/src/main/resources/templates/fragments.html
tasks.html
The tasks page allows to interact with the Spring Boot API example and display / add new tasks.
https://github.com/zitadel/zitadel-java/blob/main/web/src/main/resources/templates/tasks.html
UiController
To serve these pages and handler their actions, you finally need a UiController.java:
https://github.com/zitadel/zitadel-java/blob/main/web/src/main/java/demo/web/UiController.java
Start your application
In case you've created your own application and depending on your development setup you might need to build the application first:
mvn clean package -DskipTests
You will need to provide the issuer-uri (your ZITADEL domain) and the client-id previously created:
java \
  -Dspring.security.oauth2.client.provider.zitadel.issuer-uri=<see configuration above> \
  -Dspring.security.oauth2.client.registration.zitadel.client-id=<see configuration above> \
  -jar web/target/web-0.0.2-SNAPSHOT.jar
This could look like:
java \
  -Dspring.security.oauth2.client.provider.zitadel.issuer-uri=https://my-domain.zitadel.cloud \
  -Dspring.security.oauth2.client.registration.zitadel.client-id=243861220627644836@example \
  -jar web/target/web-0.0.2-SNAPSHOT.jar
If you then visit on http://localhost:18080/webapp you should directly be redirected to your ZITADEL instance. After login with your existing user you will be presented the profile page:
Completion
Congratulations! You have successfully integrated your Spring Boot web application with ZITADEL!
If you get stuck, consider checking out our example application. This application includes all the functionalities mentioned in this quickstart. You can directly start it with your own configuration. If you face issues, contact us or raise an issue on GitHub.